Our edgings are made of high quality materials and are guaranteed to last. However, proper installation goes a long way toward ensuring a successful landscape project. The following diagrams will help guide you through the proper techniques for joining lengths together. Since our edgings come in different styles and utilize various connectors, each one has its own preferred connecting technique. Depending on your product, let the corresponding diagram help you to familiarize yourself with the basic technique. Of course, if you have any questions regarding these guidelines, please feel free to contact us and one of our experienced team members will be happy to answer your questions.
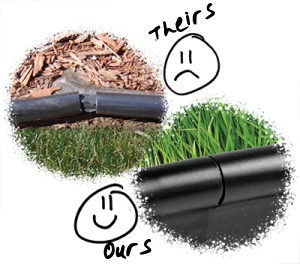
Edg-KingTM Connecting Basics - Overlap Method
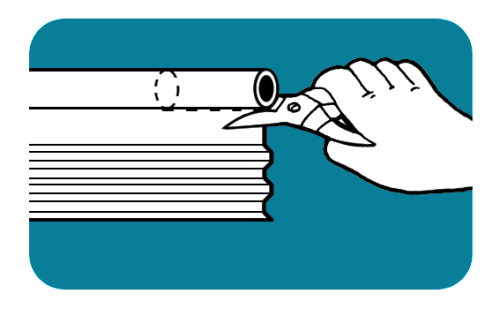
1. Cut off a 4” section of the round bead at the top of one of the edging pieces with a metal snip, utility knife or saw.
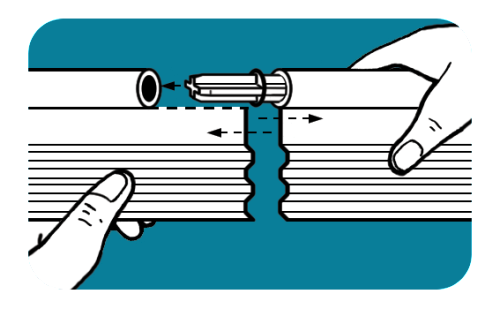
2. Use the connector that comes with the edging to join the two sections. Overlapping the two pieces of edging.
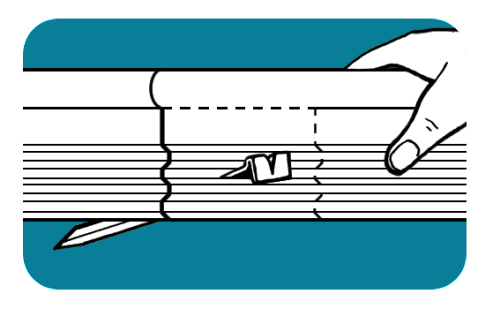
3. Drive the steel anchoring stake through both sections at a 45 degree angle toward the turf or outside portion of the bed.
Black Edg-KnightTM Connecting Basics - Overlap Method
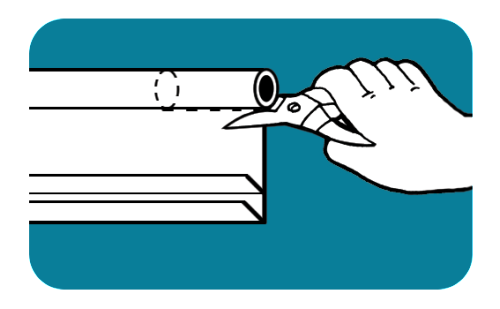
1. Cut off a 4” section of the round bead on one of the edging pieces and a 4” section of both v-lips on the other piece with a metal snip, utility knife or saw
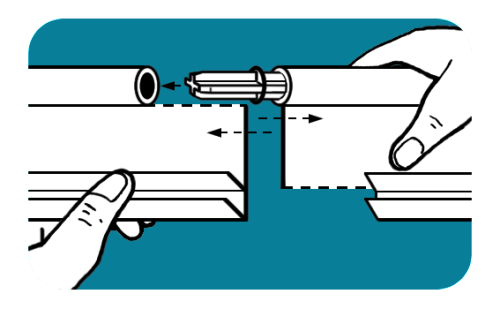
2. Use the connector that comes with the edging to join the two sections. Overlapping the two pieces of edging.
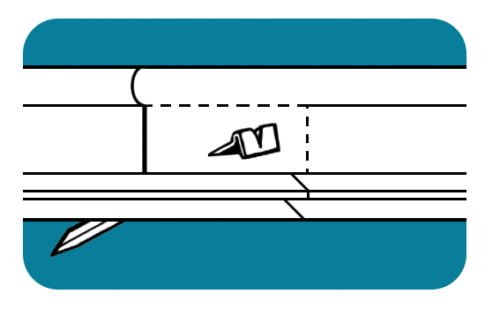
3. Drive the steel anchoring stake through both sections at a 45 degree angle toward the turf or outside portion of the bed.
Black JackTM Connecting Basics - Overlap Method
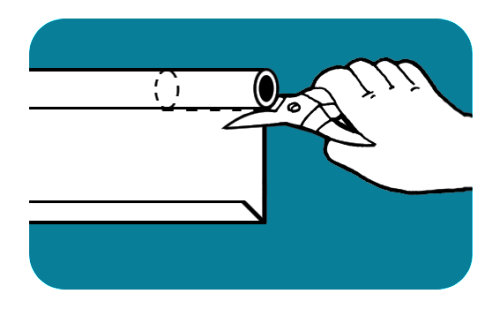
1. Cut off a 4” section of the round bead on one of the edging pieces and a 4” section of the v-lip on the other piece with a metal snip, utility knife or saw.
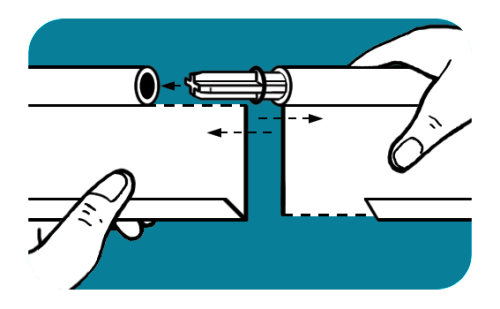
2. Use the connector that comes with the edging to join the two sections. Overlapping the two pieces of edging.
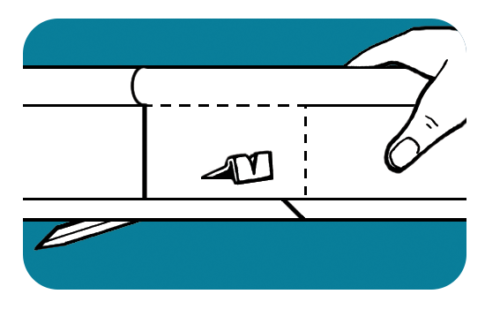
3. Drive the steel anchoring stake through both sections at a 45 degree angle toward the turf or outside portion of the bed.
Trim-LineTM Connecting Basics - Overlap Method
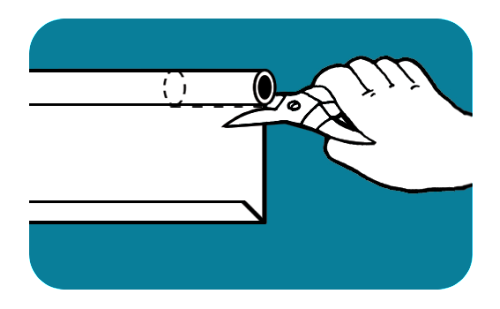
1. Cut off a 4” section of the round bead on one of the edging pieces and a 4” section of the v-lip on the other piece with a metal snip, utility knife or saw.
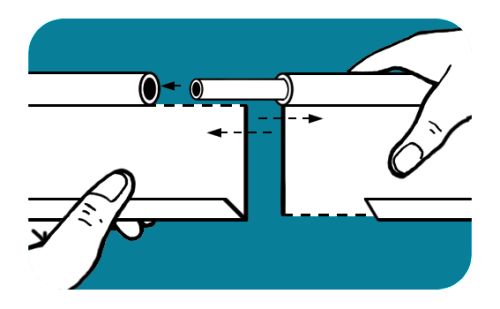
2. Use the connector that comes with the edging to join the two sections. Overlapping the two pieces of edging.
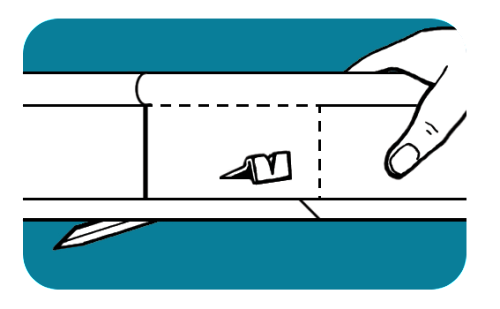
3. Drive the steel anchoring stake through both sections at a 45 degree angle toward the turf or outside portion of the bed.
Slim-EdgTM Connecting Basics - Overlap Method
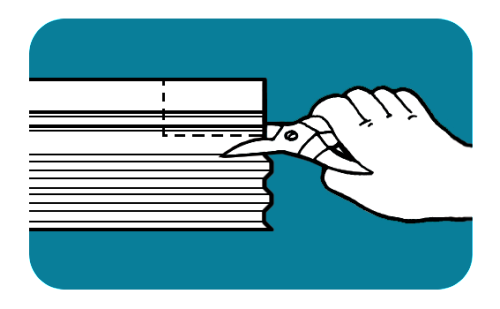
1. Cut off a 4” section of the top of one of the edging pieces, just below the bottom bead, with a metal snip, utility knife or saw.
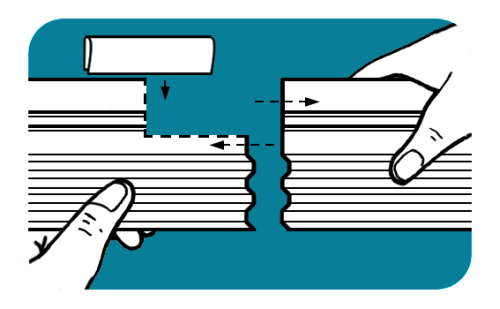
2. Use the connector that comes with the edging to join the two sections. Overlapping the two pieces of edging.
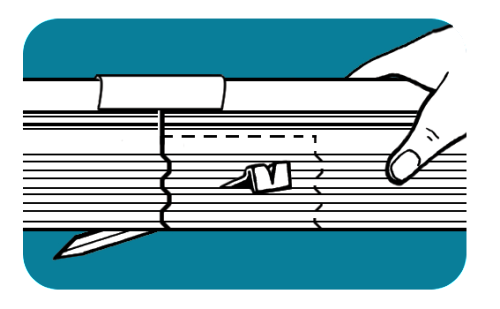
3. Drive the steel anchoring stake through both sections at a 45 degree angle toward the turf or outside portion of the bed.
Super-EdgTM Connecting Basics
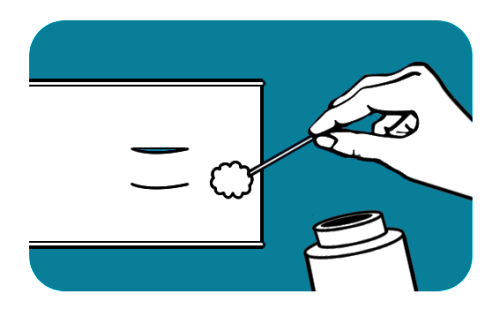
1. Using a hacksaw, cut both pieces of edging leaving a stake slot 3” from the end. Apply PVC cement to both sides of the edging, front and back.
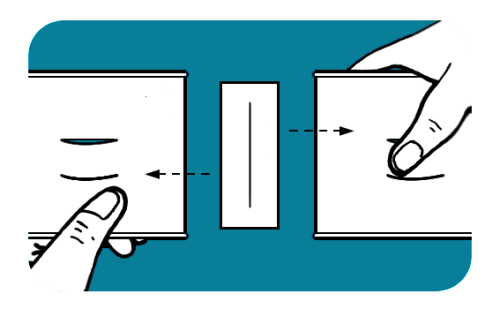
2. Use the connecting H-clip that comes with the edging to join the two sections. Do this quickly before the glue sets.
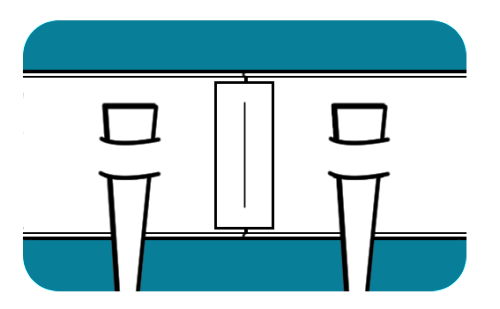
3. Drive the 14” steel anchoring stake through both sections using the pre-cut slots until the stake cannot go any deeper.
