Our edgings are made of high quality materials and are guaranteed to last but proper installation goes a long way toward ensuring a successful landscape project. Be sure to have enough stakes and connectors available.
Lawn Edging Installation Basics with Overlap Method
Step 1
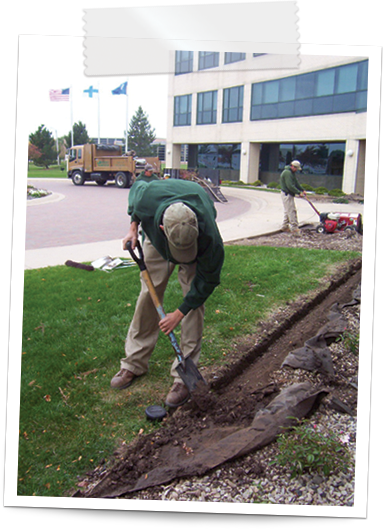
Outline the border of the lawn edging to assure an accurate and straight installation. Dig a 6 inch deep trench using a trenching machine or straight edge spade shovel.
Step 2
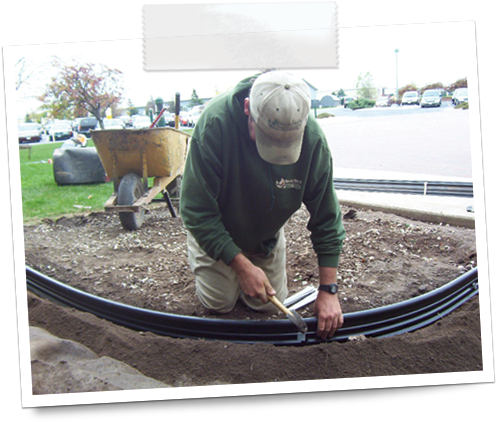
Place edging into trench with the edging’s top bead a half of an inch above the finished grade. Drive a few steel stakes at a 45 degree angle through the lawn edging toward the trench wall to hold the edging in place and be sure to leave 2 inches undriven. See ‘General Tips’ for proper staking techniques. Sparingly stake the edging until you are satisfied with your design.
Step 3
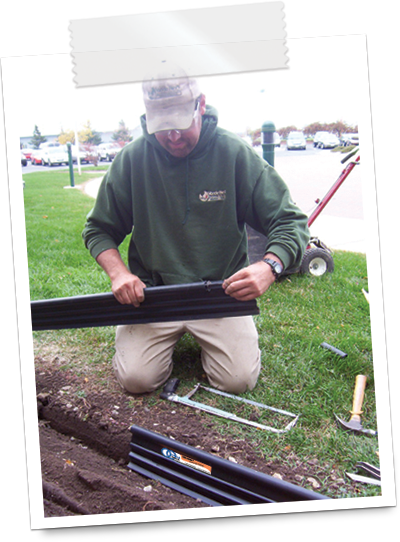
Use Oly-Ola’s overlap method when joining two pieces of lawn edging together. Learn more about this installation technique below or on our 'Connecting Lengths' page.
Step 4

Finish securing the lawn edging with additional stakes. Oly-Ola provides 4 steel stakes with each piece of edging; however, we recommend using extra stakes when securing joints and curves. Do not make the mistake of using too few stakes, especially when the ground is exposed to cold temperatures.
Step 5

Backfill both sides of the edging. Compact the backfill material along the lawn edging until the top of the edging is a half of an inch above grade. Clean up and remove excess material from the site.
Step 6
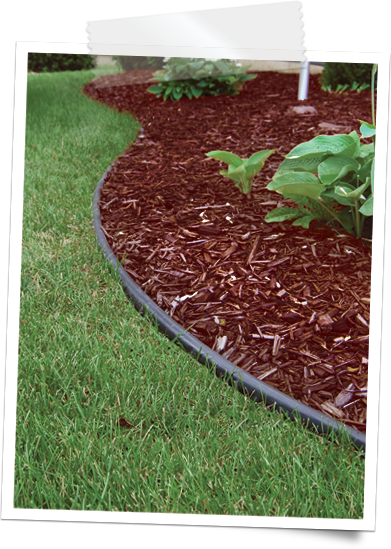
Properly installed lawn edgings form a clean, neat, almost invisible line between planting areas and turf or ground covers. Poly or PVC edgings have no sharp edges and are safe to install.
Photos courtesy of Vande Hey Company - Appleton, WI.
Edg-KingTM Connecting Basics - Overlap Method

1. Using a hacksaw, cut both pieces of edging leaving a stake slot 3” from the end. Apply PVC cement to both sides of the edging, front and back.
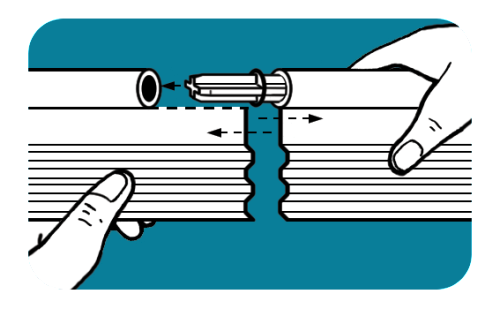
2. Use the connecting H-clip that comes with the edging to join the two sections. Do this quickly before the glue sets.
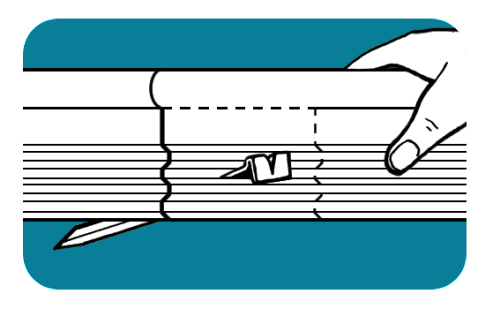
3. Drive the 14” steel anchoring stake through both sections using the pre-cut slots until the stake cannot go any deeper.
Paver Edging Installation Basics
Step 1
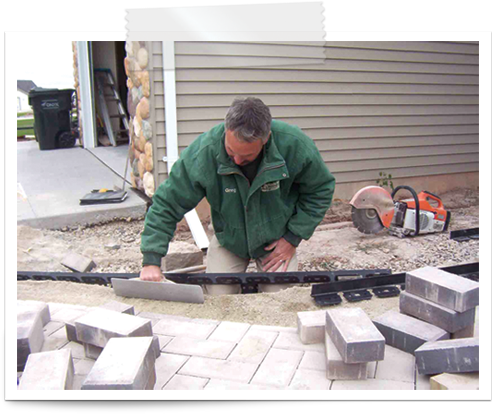
Outline the border of your walkway or patio to assure an accurate and straight installation. Evenly layer a crushed rock base, compact it, and level it beyond the outline of the installation.
Step 2
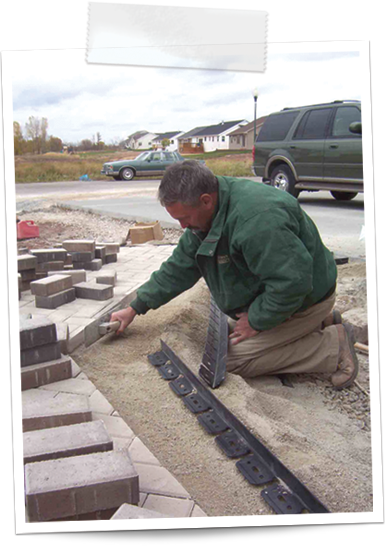
After the pavers have been set in place within the design, position the paver edgings along the outside perimeter of the installation. Make sure to set the paver edgings low enough, so that the soldier course is level with the rest of the brick.
Step 3
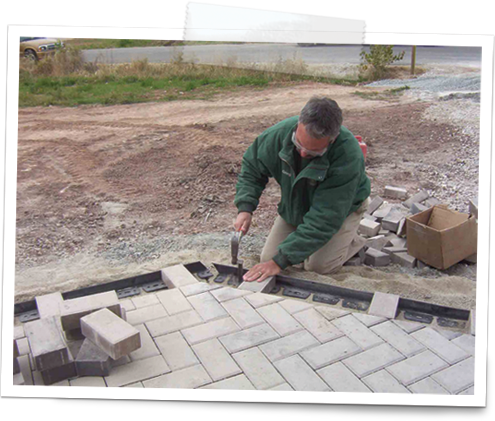
Measure the final row of pavers before securing the paver edgings with Oly-Ola’s 9.25 inch non-bending, steel anchoring stakes. Stake the restraint every two feet at minimum, using extra stakes when securing joints and curves. Do not make the mistake of using too few stakes, especially when the ground is exposed to cold temperatures.
Step 4
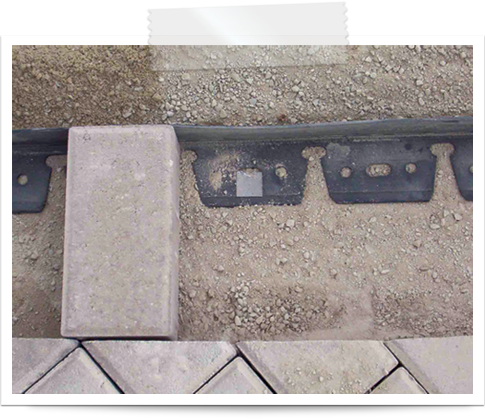
Install the final row of pavers on top of the horizontal leg of the secured paver edging. Our paver edgings may also be installed up against the paver, with the horizontal leg on the outside, if the installation requires it.
Step 5
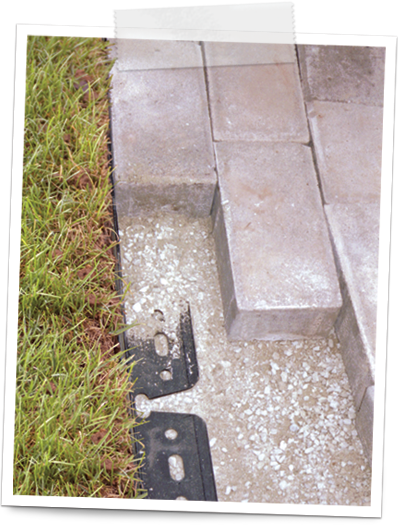
Paver edgings hold the pavers permanently in place, keeping the pavers from shifting. When properly installed, the restraint should be barely visible or not visible at all.
Photos courtesy of Vande Hey Company - Appleton, WI.
ALTERNATE Paver Edging Installation
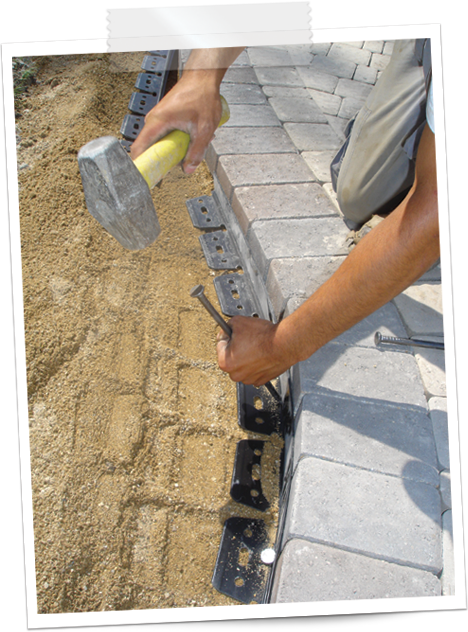
Pictured here, Doyle Brick Paving of Addison, Illinois, and many others, have had a good deal of success preventing spike heaving by using this alternative installation method. Instead of using the provided stake holes, a stake can be driven directly through the paver edging at the elbow, centered on the horizontal tab. This is done at a 45 degree angle toward the pavers. We do not recommend using this installation method with lower grade retail edgings!
